

Also Read
Here I am going to to create a 3D model by using AutoCAD software step by step process.
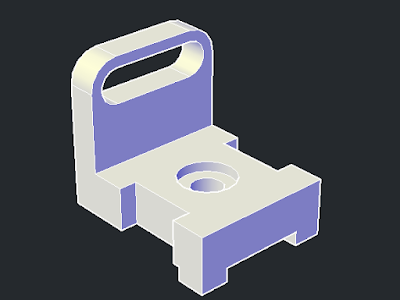
This is the the isometric view of the part with dimensions

1. Select line command and create the lines like L shape as per shown below according to given dimensions.

2. To get better visualization we split the workspace into two vertical parts.

3. Now using press pull tool create the solid of the drawn line sketch as like shown below

4. Now select the copy edges command from home ribbon as like shown below.

5. Change the view type as wire-frame and copy the edges according to given dimensions like shown below.

6. Now select the press pull command from home ribbon.

7. Then pull the closed rectangular sections up to bottom of the solid for removing the material. Now the product as like shown below

8. Now mark the center of the circle by using offset edges tool from home ribbon and create the circle on top of the surface as like shown below.

9. Now press pull the circle and create another circle on to surface of the counter hole. Again press pull the small circle throughout the solid to create a counter hole.

10. Now creating the fillets by using 3D fillet command from modify tools of home ribbon.
11. Create the edges on side surface like shown below by using copy edge command from home ribbon.

12. Now remove the material by using press full tool from home ribbon.

13. Now remove the 2D lines and see the final part created.


Comments